Tuesday, January 30, 2007

Anchors Aweigh

In my first year working at an architectural practice all I did on the conveyor belt of construction documentation was toilet layouts, ceilings and basement parking. "Young man" (as the old man used to refer to me as) otherwise it was the run of the mill Jnr, Mik, Skivie, or just plain "The Ceiling guy". At least I wasn't just a number?????

Why oh why, did I not have a simple tool like that of Dimensions + EQ back in the day. String a row of toilet cubicles and hit equal.... BANG!!! Done. But no,...... offset 900mm, then offset 90mm, then copy, then endpoint and endpoint................. then changes and start all over.

I wonder how few of you know that, in the equal string of dimensions, exists a small but marvelous little tool namely the "Anchor". By toggeling the anchors position (a simple click 'n drag of the mouse) one can achieve various results of the EQ dims. The Anchor symbol designates which element will remain anchored while the rest are altered.


Thanks... glad I could help!

Friday, January 26, 2007

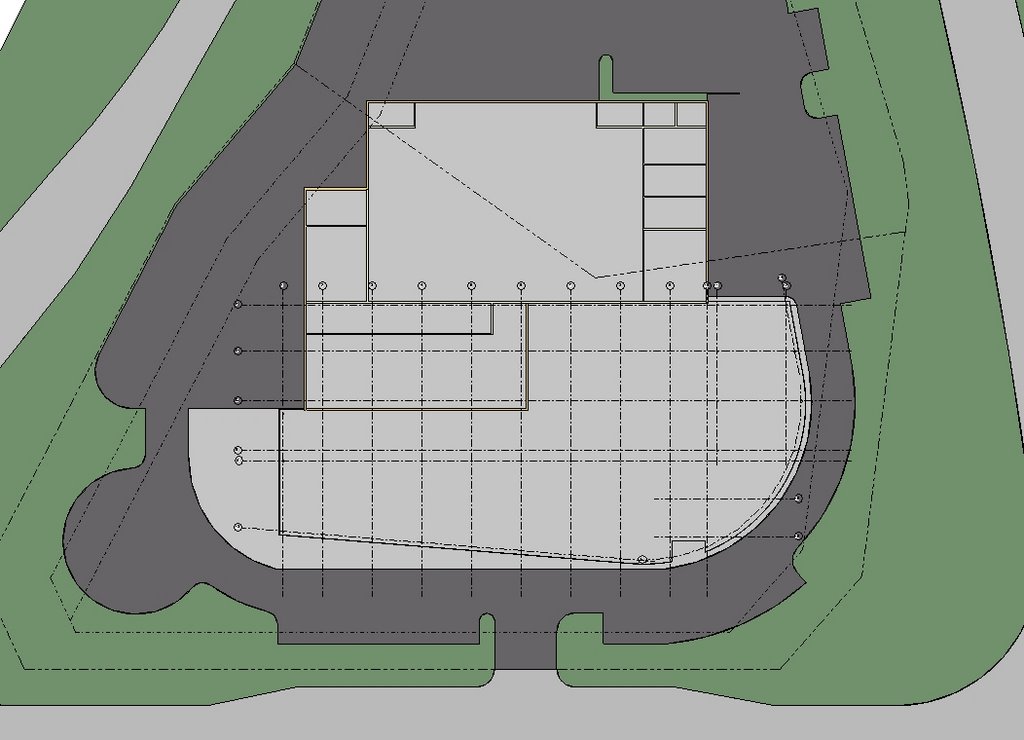
What a perfect View?

It's far to often that I come across Revit users not using the view capabilites and duplicate views with various options correctly. It is so easy to create many instances of the same view and have different visibility settings for each.
A simple example of this is......
In any given project (it's actually set up in my templates) I will have at least 10 various 3D views and slices. With the size projects we do, there is nothing more frustrating than trying to spin an entire model around to see something on the other side.
So there starts my 1st 4 views.
1. Orient to North west-South east and so on.
2. Then we set up views by disciplines (found in the View Properties). Architectural; Structural and so on. So when we need to work on structural or mechanical elements, no need to switch stuff on or off, simple go to the dedicated view discipline.


3. Then we will create slices through all critical areas, which reflect directly on the sections we are working up.


All these duplicate 3D views apply to our plans and sections as well. So for plans we would have a, Ground floor Overall Documentation, then GF Architectural Model, GF structural, GF Mechanical and so on....


So get to see the perfect views and start using them to benefit your design, co-ordination and speed with which you move around the project.

Oh, by the way, this building is of Porshe's new showroom in SA Johannesburg. It will be the largest (10 000sqm) privately owned Dealership, Showroom, Workshop, Bodyshop, Racing Tuning shop and Training Centre worldwide!

Built first in Revit!

Wednesday, January 24, 2007

Get your act together?

After what seems like decades (I have actually posted something here) of waiting for Cadplan to get there act together, Marek Brandstater and his team have finaly launched Digital Building Solutions.
Their product line is geared to provide the BIM users with much anticipated software solutions.

Two products (out of the five) have been launched so far.

The first - Shortcut Highway

"Shortcut Highway is a powerful productivity tool that allows you to edit and manage AutoDesk Revit's Keyboard Shortcuts. Without Shortcut Highway the only way to edit shortcuts is with a standard text editor such as Notepad."


The Second - Content Highway

"Content Highway is an ambitious and exciting project to manage and share Revit families and Autocad drawings - from your desktop, to the web and back again."


Content highway is packed with so many cool features,
Load and manage multiple libraries on your PC and across the network.
Thumbnails and a resizing tool
Sort families by any number of fields, including Supplier, Uniformat, Masterformat, Path, Filename, Cost, etc.
Live search features.
The coolest one for me is the ability to scan existing or old projects for families through "Project Manager" and export the families to your libraries.


Be sure to check out and download.

Friday, September 22, 2006

Browser Organization.

Few know, not only how to work with the browser organizer but also how to make it work effectively for you.

One of the biggest issues I have when auditing and dealing with clients f*/&^ing messy files is the lack of discipline applied when creating levels and the naming convention thereof. How on earth is anyone supposed to know what the heck “Level U/S SS RC-B” is supposed to be, and on top of that there are 3 of them with varying case sensitivity.

Now, I have had it happen a few times that a Revit user has left a firm, and we now have to clean the file up, so that it makes enough sense, for others to continue on. It’s like those frikkin layers in ACAD, if the standards are not adhered to then …….. MESS!!!!!!!!

The Browser Organizer becomes our “Big mate” for a few hours. By sorting anf filtering options we can quickly determine what view was actually meant for what purpose

In big Projects, Browzer Organization is an absolute “No Brainer”. It allows you to effectively streamline the otherwise out of control and massive list of views that go with the territory.

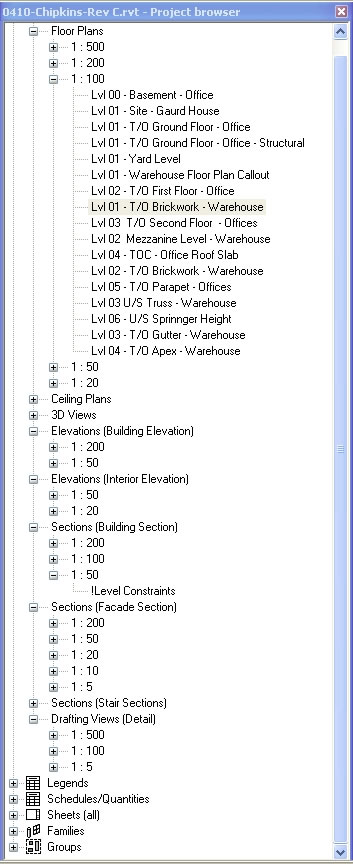
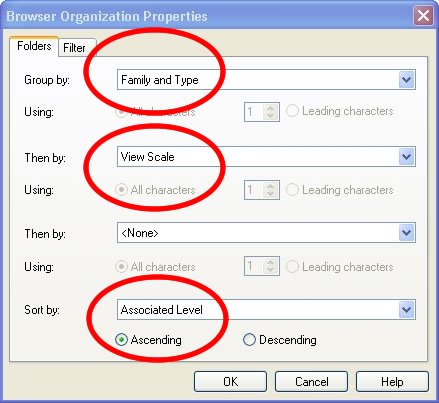
The method for Browzer Organization that I have found suites our offices the most effectively is by organizing the views by scale then by associated level. This allows us to work on the parts of the project that are required in that instance of the project time line.

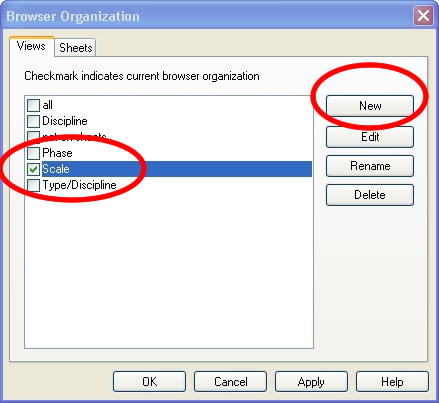
The following illustrations define what I consider as the best manner in which to organize those views.


Wednesday, September 20, 2006

Family Editor Revisited

I have prepared a number of articles on the family editor mainly targeted for those just starting out, and for those just looking to pick up a few tips along the way. I will be posting a number of these articles over the next few weeks.

Do enjoy!!

Starting with.

Family Templates and Categories

There are three types of families in Revit.

1. System families which consist of
o Walls
o Floors
o Ramps
o Roofs
o Stairs
o Railings
o Ceilings

2. In-place Families
On the fly, project based custom families.

3. Model Families

New Revit families are started using a family template.
There are three types of family templates one can use to build and customize your library:

1. Annotation family templates
2. Title block family templates
3. Model Family templates

All have the extension or file type in Revit of *.rft , simply for Revit Family Template.

When starting a new model family, Revit by default, opens the model template directory, offering you the chance to select the correct template file for the correct category of the component.
Some of these family template catagories have more than one template file and these are known as host family templates.
These templates allow you to build families which host to system families.
Wall based; Floor based; Ceiling based, Face Based and Roof based family templates. Host families require the host element in the project file to attach to. This way one can add a wall based plumbing fixture to a wall in the project. When the wall moves the fixture moves with it, saving time when editing.

These templates are used for a number of reasons
1. Starting guides to set up the families.
2. Categorize the family component into building categories that Revit can understand in the database for reasons of scheduling.
3. For you to organize your library.

Revit provides a library of about 110mb of families all divided into directories of the categories.
Over the last 5 years I have increased my own to over 4gig’s of components, so organizing the library becomes a massive task. These directories are a guideline for you to further evolve the library.
e.g. Under Casework I have 4 more:
o Floor units
o Wall units
o Worktops
o Counters
o BIC’s

Categories
Model Families built in a specific category can be changed to another for various reasons and scheduling purposes.

Too change a family’s category.
1. Open the family save it as another.
2. Select Settings\Family Categories and Parameters……
3. Select the new category from the list and hit OK.
4. Load the family into your project.

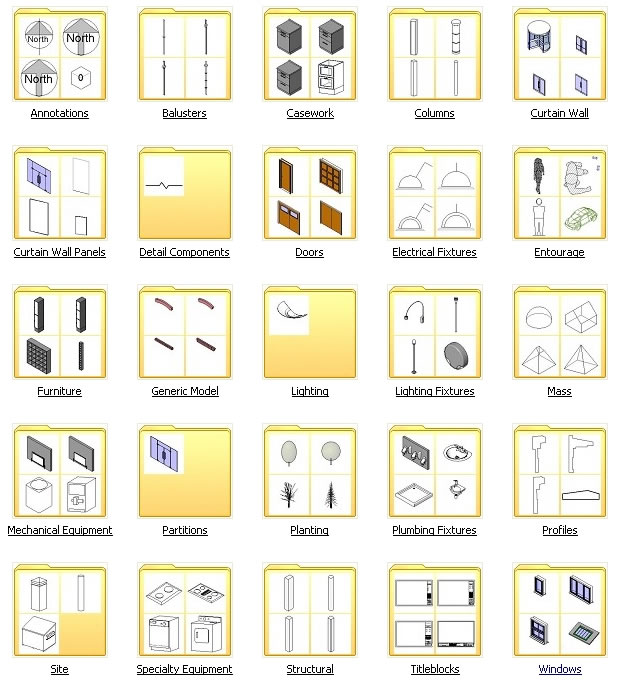
List of Standard Library Catagories

Thursday, September 14, 2006

Detail Components Uploaded

I keep coming across people that are still modeling in Revit and detailing in CAD. Why oh why, would you want to do something so STUPID?

Revit has the massive ability to use both 3d elements and an overlay of 2d components. The process of detailing in Revit is actually so much easier than anything I have used in the past!!!!

Detail components are your biggest weapon to finally cross over to full 100% Construction Documentation done inside Revit.
Spend time in building your detail component library. Hey! it doesn’t take that much time either. You have got all the ammo, stored in your unintelligent software as blocks.

It’s a case of starting a new detail component family template and importing that CAD detail you need. Either, trace over it, or explode the CAD symbol, save it and overlay it back in your project.

KISS (keep it simple stupid) applies here. There is no necessity to go off on a tangent and spend 6 hours building a complicated 3D family to be able to detail it further when all you need for construction are 2d details.

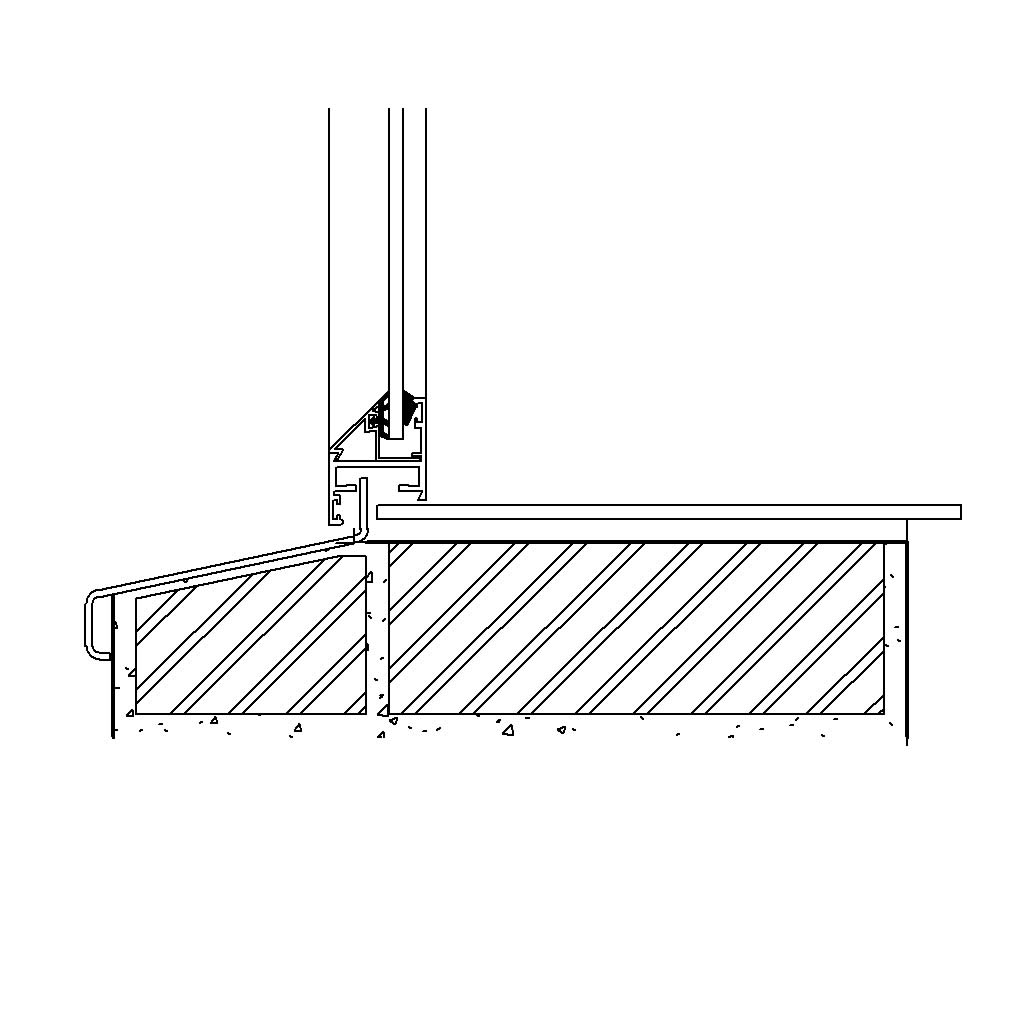
Here is a simple example of a Window Cill detail. This is a block I have had in CAD for Years. Now in the detail view in Revit I switch off the model category – windows, and overlay my Window Cill detail component and annotate.


These types of families take no longer than 5 minutes to build.

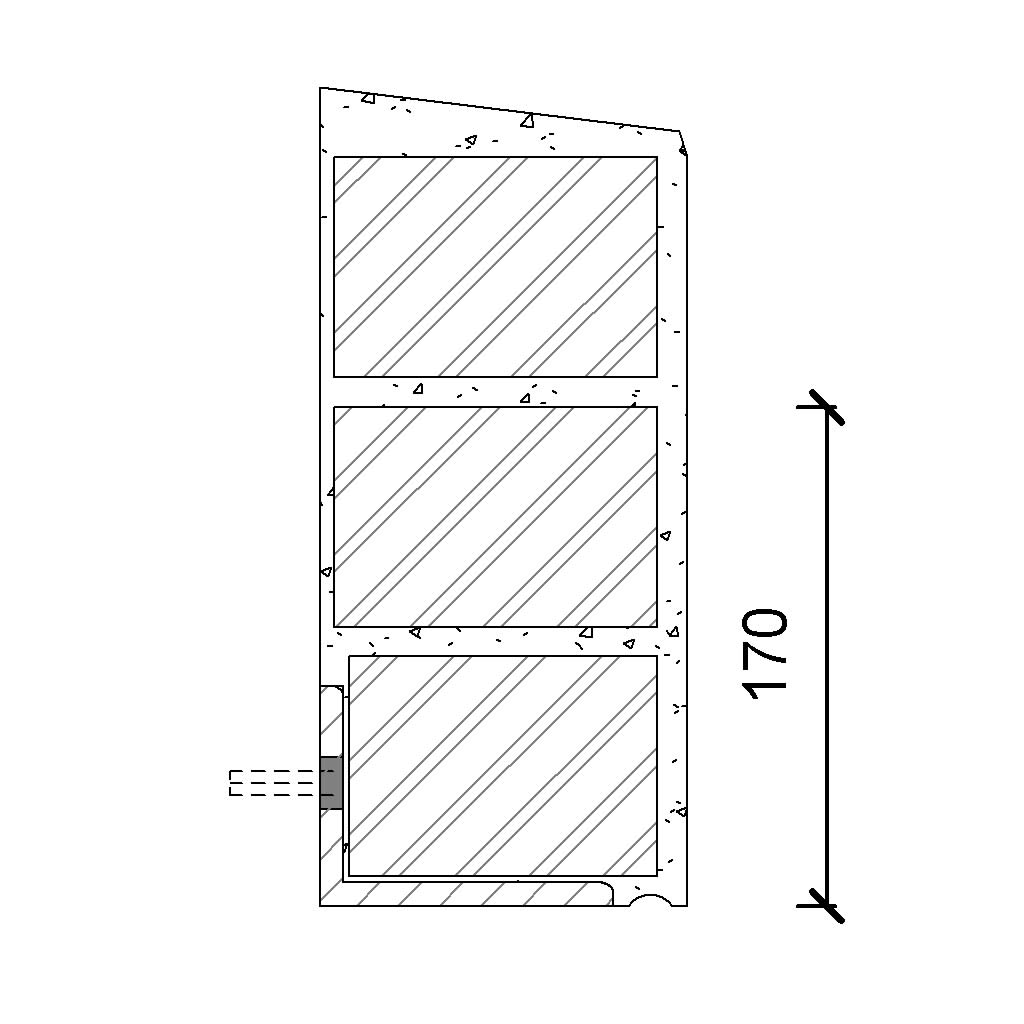
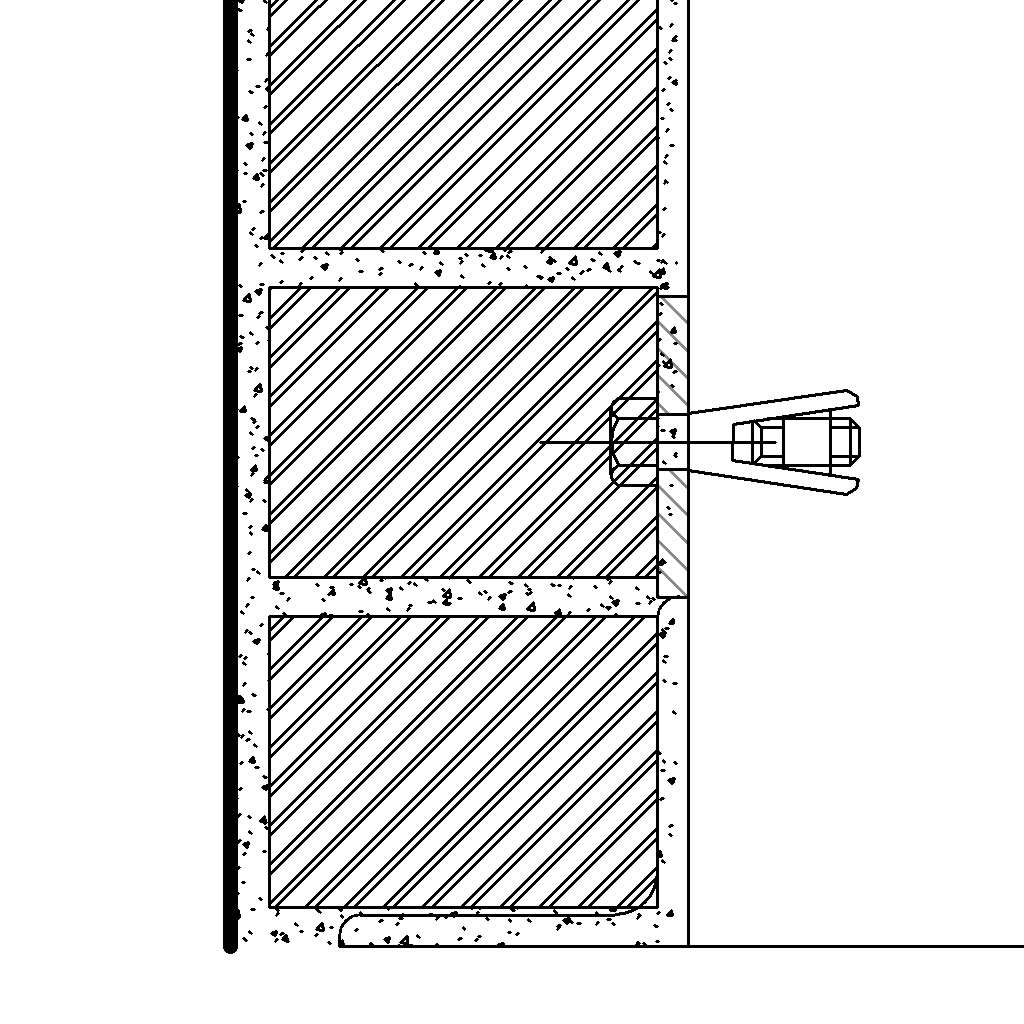
Where the power truly comes in… is nested, detail components within hosted profiles. The one we use like the trigger on an AK is slab edge profiles with nested detail components. Wherever you cut through the slab edge there’s the detail.


Now play around with levels of visibility…..course, medium and fine, and you can easily set up nested details to drill down from 1:50 to 1:5 without touching or adding anything to the component for the various scales. The Steel Angle and Bolt or tie you see in the image is set to display at fine (1:10 and bigger). From 1:20 upwards there is no angle or bolt.


Over the course of the next few weeks starting today I will be posting a host of detail families to Family of the Week be sure to check it out.

Wednesday, September 13, 2006

Populating Google Earth with BIM


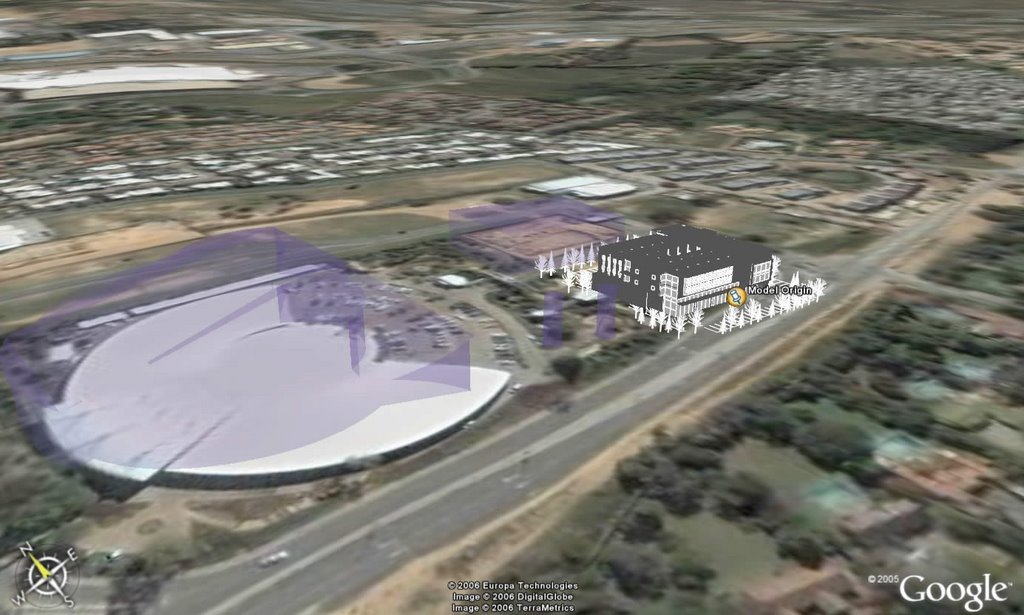
How cool is this. I can now take my Revit model and "plonk" it on to the site in Google Earth.

I originally came across this on David Lights Blog - a Plug-in for Revit to Google Earth. Downloaded….installed….. and my clients are going nuts!!!! Man, this works!!!!!!

For those of you in SA if you have been on my Advanced concepts training with Cadplan, the whole exercise on specify coordinates truly comes into it,s own now. Those that haven’t been yet best you book at Cadplan.

I reckon if I stated to a client about three years ago that we will soon be interacting with the world map and CAD software….. they would have thought I was the one that was nuts

Thanks to the likes of Google, Avatech, and Autodesk Revit, the trends in BIM technology go way beyond….

Check out: Avatech for the plugin download.
Google for the Earth download

Tuesday, September 12, 2006

Paradigm Shift found!

While gaining momentum in total “Revit Blogshare Domination” (on Blogshares) I managed to stumble across a few new cool Revit blogs.

The one that really caught my attention was Paradigm Shift by Sean D Burke.
Some really great articles plus more links to even more great articles.
Fresh reading, Be sure to check it out!!!!!

Another, for the Portuguese tongue, check out Up to Work.
I couldn’t really judge on the content as I am a multi-lingual illiterate.

Wednesday, August 23, 2006

Revit Resources

If you are looking for the most comprehensive list of Revit Rescources on the Web, be sure to check out Cadplans Revit Resource Page.
If you would like your link added just drop Niki an email. Her address is found at the top of the page.

Thursday, August 10, 2006

"Failure to triangulate surface"

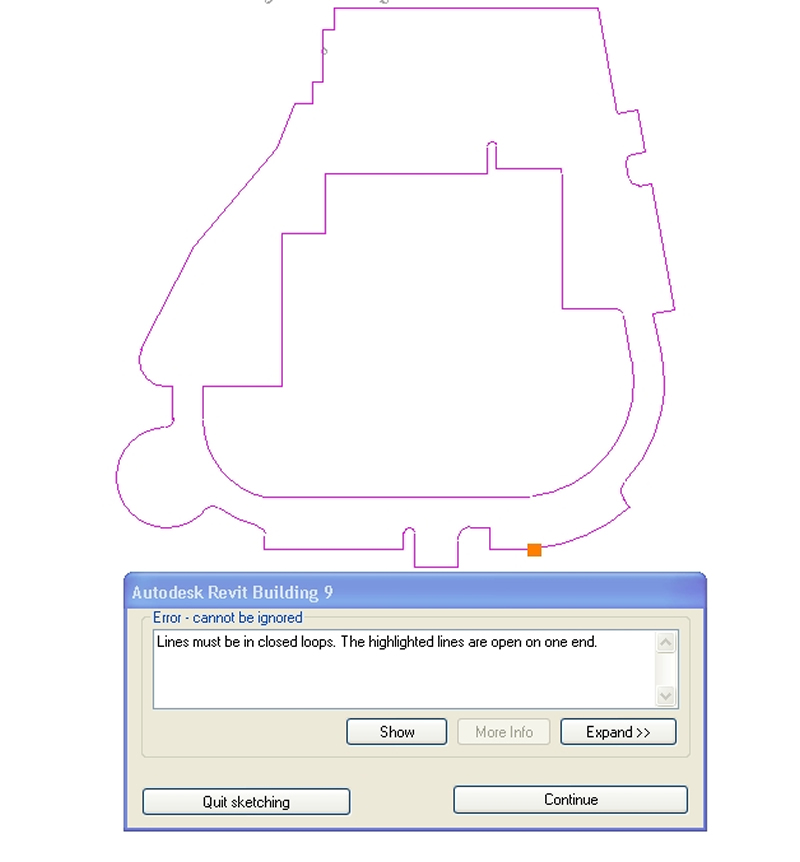
When working with a “Subregion” on site topography, I have often come up with the issue of "Failure to triangulate surface". Well it's not really an issue, other than Revit’s Sub-region tool’s inability to correctly indicate where the line join problem is.


The workaround I often use is to copy the sketch of the sub region. Then start a new floor sketch, and “Paste Aligned” the sketch lines. Finish sketch will then indicate where the joins or “intersecting lines don’t meet. Trim them up and “Copy” and “Paste Aligned” that back to the “Subregion” tool, Finish sketch and problem resolved.


Floor Sketch


Completed Sketch

Thursday, August 03, 2006

Beware of over-modeling

Lets face it, it is so cool to rebuild real life components as they really are. However there comes a time when you need to draw the line!

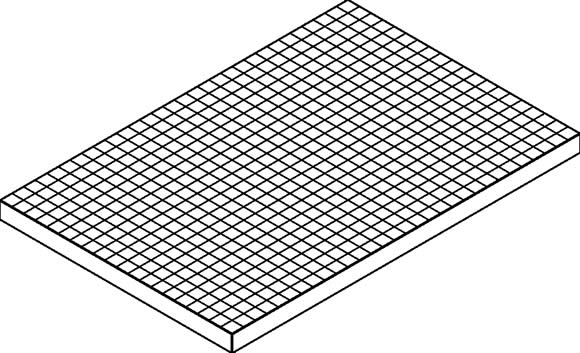
Take for example a stormwater mentis grid. It's very easy to setup a family with all sorts of array formulas to control the vertical and horizontal grids of the element. Just bare in mind that such a family is heavy and slow to manipulate. Now on a large project 20 of these spread around the site leads to bloat and large project files.(Fig1.)


One can simply achieve the same effect with a surface pattern. (Fig.2)


Both these families will be available for download on RFM shortly.

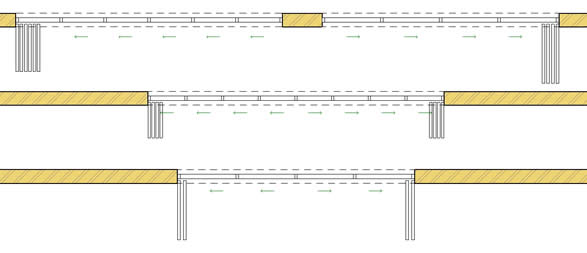
Within the next few weeks, I will also be posting a number profiles with nested detail components. These are such cool families to learn how to do, especially for those of you who want to seriously start crossing over to full construction documentation done inside Revit. Take Time in setting up your details or detail components, then, simply nest them into a profile Family. In the Project wherever you cut thru' the profile the detail will be visible in section. By assigning various levels of detail to the detail components, allows you to see what you need at the various scales.
The simple example below is a slab edge detail we often use.

Thursday, July 27, 2006

Family of the Week update.

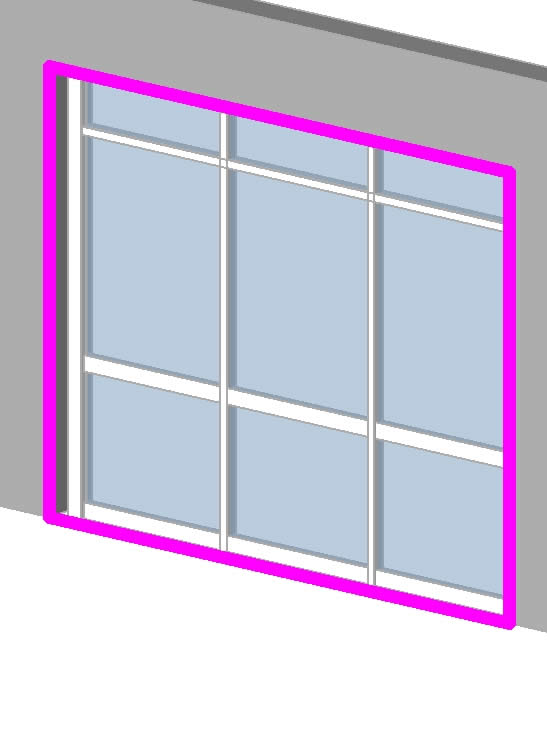
Just a reminder that I have updated the Variable Shopfront Window for those who have requested so.
It now works out the array of the mullions properly to equal center lines, so that all panels are equal. It also allows for one center mullion or two equal panels now.

Available for download.
Thanks to those of you who did remark on it's pitfalls.

Thursday, July 20, 2006

“His empire is solid. He's created a template that others can follow.” - David Wolfe

I am busy Implementing Revit at my third site now. I chose this architectural firm because of the challenges it presented, in terms of the lack of Revit skills as well as the various fields or sectors of design and construction they specialize in.

The office consists of 11 CAD users, with only 2 that have been on Revit fundamentals training (over two years ago). Neither of them had used any of those skills to attempt a project in Revit. I have been here for 2 months now (plus two weeks needs assessment), and have got through setting up and educating 4 of the users.

The projects are starting to role out comfortably along with the projected timeline of the project schedules of construction. All four projects are in Construction documentation phases and are currently busy with earth works with construction to start shortly.

Based on the last two implementations I opted for a new strategy on this one.
I attribute the ease of how the users took to this transition on the following facts.

Revit Implementation.

Preparation.
Instead of jumping right in and getting started, I chose to spend two weeks in their office (getting paid of course). I was to prepare the following:

Team Selection.
Take time to get to know the staff. Fine tune your selection for a team that would be willing to take the leap. Look out for things like enthusiasm, attitude, practical and logical skills and rational. Age should also be part of the criteria. Young guns seem to catch on to this software as if it were Sims. It’s like playing a PC game or building those intricate custom Doom Levels as they have done till early hours of the morning.

The first team should be no larger than three people if you are the only implementation specialist. It becomes a logistical mess if bigger.
By getting 2-3 willing people with the right attitude and skills on board, then getting it all to work, causes great excitement in the office.
This starts generating a vibe in the office that the not so enthusiastic pick up. People hate feeling left out! I call them the “Let me see” lurkers. Although skeptical, they start lurking, over your shoulder with the “Let me see” or “show me, show me” command constantly being released from their traps.

They then become easy picking for the next round of training.

So pick the team that will give you the best vibe!

Project Startup.
Besides getting acquainted with the staff, take on a project during these two weeks that is current and busy with construction. This is done for two reasons.
One, familiarize yourself with all their office standards and apply those to families as well as a template that constantly, gets updated.

Secondly use it as an indication or the setting up of a bench mark. This builds the confidence of the decision makers that “Yes” this can be done in Revit, and “Wow” fairly quickly at that.
Once again this generates excitement. By applying a few added features such as 3D perspectives and slices (scope box 3d views) printed in colour with shadows to take to the meetings, really puts the cherry on the cake. Project architect walks into the meeting with “hey check what we can do now”.

Alignment.
Get the buy in from the right people. Align yourself with not only the Architects but with the whole professional team. It only takes two or three meetings to do so. Show off with the database to the QS and client. Brag with the topography tools, cut and fill schedules with the civil engineers, etc.
The trick is to put everyone at ease, that although the firm is changing their technology, the advantages that come with it are massive.
The important thing to remember here is, to build the confidence in the ability of ease of collaboration and file transfer across the various disciplines.

Office Standards.
One of the most important things to get right is the look and feel of Revit’s output or hard copies. Set up all their office standards, from the north point to the section arrow head, from the line weights to the fill patterns. What you want to achieve here is that they can’t tell the difference between their current CAD output and the ones from Revit. This will put an end to the “you can see this is printed from Revit”.

The all important Template.
This is THE KEY to your success. Over the two week period or preparation period really invest the time in building the most comprehensive Office Revit Template. This will include what I term as the “Family Starter Kits”. Take the time to setup and build a large majority of their local standard building components. Build “Smart Families”. Include documentation with these smart families to explain all the parameters that affect it. You will find a common design theme in a firm, use these themes to your benefit to build these smart families.
Rebuild all their standard detail symbols. Annotation symbols and so forth.
Set up all the system family standards. Wall styles, floor styles, roof styles etc.

Document the template comprehensively and provide your client with this document.

The reason for all this is simple. It’s easier to get started with something new if there is an element of familiarity to it all. By presenting a template and a document, that the user can refer too and is fairly comfortable with, eliminates a part of the learning curve, thus making your job easier. This allows the user to actually “get on with it” and concentrate on the necessary modeling tools, without having to worry about how to make that wall thicker.

This completes the needs assessment or preperation phase.

Training and implementation

Holding hands.
Custom Family building for your client vs. training the users on “How Too” is very much on the fence. This is entirely up to how you want to involve yourself. One has to weigh up the pros and cons. it's a case of, do whatever it takes to keep your client (and pocket) happy.
For me, it all depends on the project and project roll out.
If it is a fast track project you are only going to send the new user to levels of frustration he/she has never experienced. Don’t throw them in the deep end with confusing the issue further by adding Family components to the already smoldering pot. Rather hold their hand and build the families for them. When time is on your side teach the user how to build the family you just did.

The Project.
Choose the right project. Don’t go big!
Select a project type with known figures. This way one can compute, gauge or measure up on existing time lines.

Documentation Discipline.

1st rule for the user – Stick to what you need with what you know!
Yes the 3d view is so cool hey. Well it doesn’t help; it will just suck up all your valuable time!
To keep up with the project time line stick to the documentation list that is required.
For example – for municipal submission one needs plans, sections, elevations at 1:100. Well!! Do those then!
Stop the user getting caught up in all the rubbish. Concentrate on the 2d documentation that is required. Don’t let the user get concerned with the fact that the window he is trying to put in, is not an Anderson casement blah, blah, blah, just use a window, any window as long as it looks sort of the same. Users tend to get into a panic if the manufacturers name is not part of the label.
They tend to get to specific to early. Remind them that this is a database, as long as a component is there representing the item we can always alter it easily at the correct time in the project. Now is not the correct time.
Until the user is proficient at Revit force them to stick to the documentation required. Only when the user becomes the expert will time be on their side to explore further intricacies in construction documentation.

Avoid over documenting.
Revit produces drawings so easily, it can lure a firm into over documenting a project. You need to establish a standard office guideline to which project documentation should adhere too. There are the added issues like project fee structures. Does one sacrifice profit for standards that are possibly set too high. Do you alter the standards, based on the project brief. The design and drafting team ultimately, has to be informed of the level of detail to which the project has to comply with. You should possibly set up various levels as guidelines based on this.

Summary:
1. Preperation - Compiling the Office Standards and Template
2. Getting the Buy-In and building the confidence.
3. Team selection, Project selection
4. Hand Holding
5. Discipline.


Next we will have a look at “Revit in Your Office” the work flow processes as well as team management.

Friday, June 30, 2006

New Family at RFM

I have been meaning to build this family for months. I finally got a break to do so.
For those of you that use sliding folding/stacking doors in your designs, this is the family for you.
Download it at RFM FOTW


Thursday, June 22, 2006

Corner Windows Resolved

My biggest issue with corner windows is that the families available, as well as the past families I have constructed, all act as one unit.
Being one unit, makes it increasingly difficult to schedule and place on legend views, thus forcing you to create extra elevation views of the component. The scheduling problem is as such, that if one of the sides differs in width, by our standards it should then become a new window type.

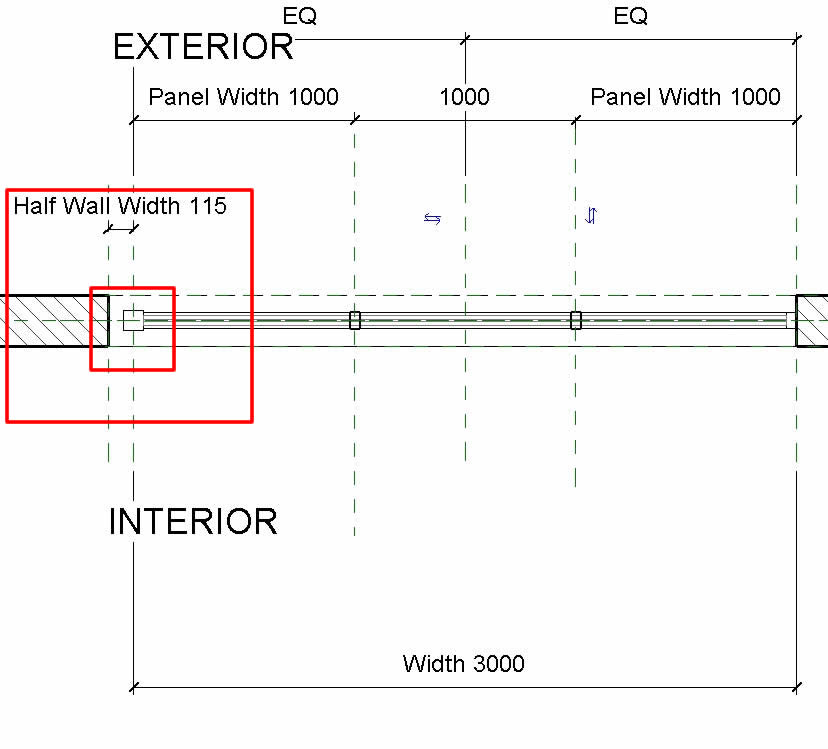
The simple solution to the problem is one needs to adjust the opening of the window family by half the wall width. You can possibly also leave yourself a parameter for adjusting that wall width.

1.In the family file of your chosen window set up some reference planes on the left or right hand side of the window which depicts the half of the wall width.
2.Select the opening of the window. This is often done easier in a 3D view.
3.On the options bar select the EDIT button. and re-align, edit and lock one of the sides to reference plans that were set up. This now creates a gap between the window and the wall opening, which allows the wall to cut further in the project file.

For a download of this file check out Family of the Week.


Tuesday, June 20, 2006

Family of the week is back!

Hi all!
I have to apologize for the brief delay in the uploads to Revit Family Man, Family of the week as well as this blog.
For the last month I have been implementing Revit at a remote site with variable if any internet connectivity. To upload a 1mb file was just ludicrous in terms of time taken to do so.
However, the latest Family of the Week is now uploaded and will continue on a weekly basis!! Be sure to check it out.

Wednesday, May 24, 2006

Rooms and Volumes

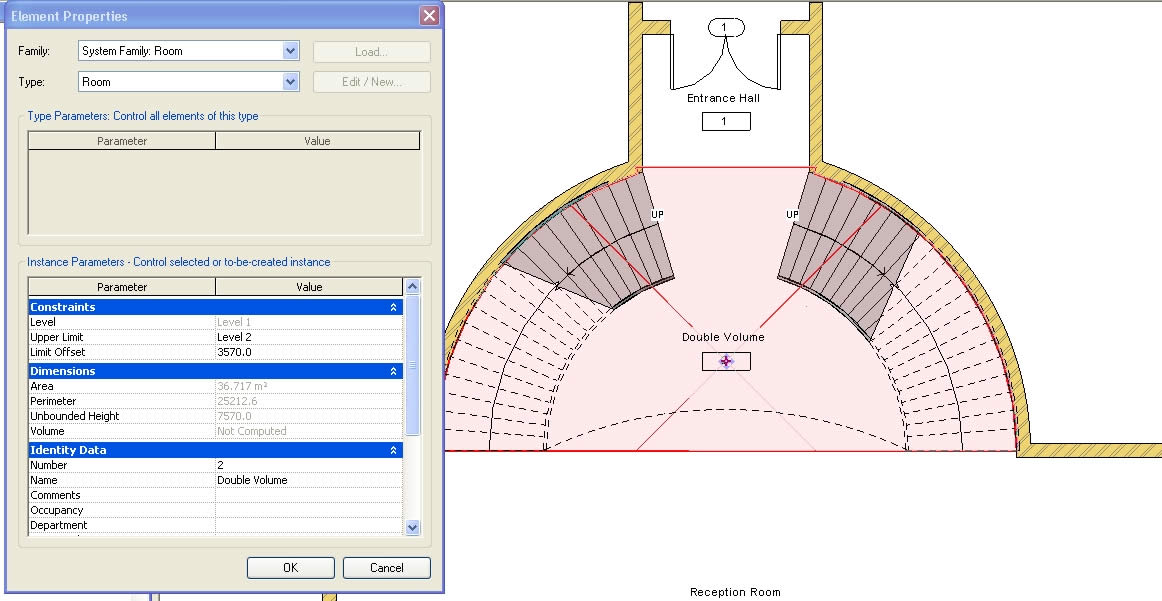
Tagging double/triple or more volume space is now a breeze in Revit R9.

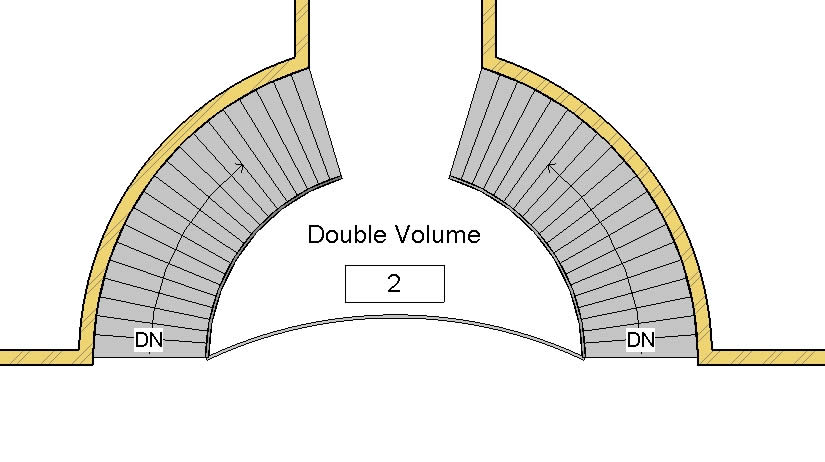
In Revit’s gone by, the only way to annotate a double volume or more was to do it using the simple text tool. The room tag could be placed on the base level of the volume, but from there, any level above had to be annotated as apposed to tagged.

With R9 and the new “Room” tool one can place the Room (with crosshairs) at the base level of the volume and then via its properties, set the parameters to the height extent or volume of the room.


In any associated level above, one now just has to add the Room Tag to pick up the name, number etc.


Just another cool added feature to Revit.

Friday, May 12, 2006

"Time is on my side, yes it is."

I have had a bit of time on my side. Family of the week has been updated somewhat over the last few days.
Be sure to check out the new downloads available! More on its way!

Thursday, May 11, 2006

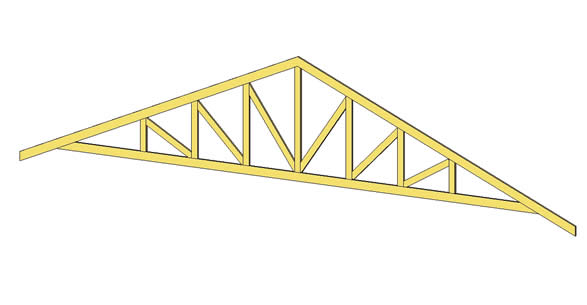
New Family - Structural Timber Truss

I have been asked a number of times if I have a Parametric timber truss. Well after digging around in the very orderly filling system I have (thank goodness for X1 desktop search) I managed to pluck a standard truss out an' posted it too Family Of The Week


Ready for Download!

Friday, May 05, 2006

More 2-Pick Examples

I have uploaded some more 2-Pick families on Family of the Week, and will be doing so as the library grows. Feel free to download comment and rate the families.

This family type has also created a great thread at AUGI with some more examples and tutorials.

Please dont hesitate to use the Contacts on the contact page for further information or help.